Your caller keeps saying, “I can’t hear you,” even though your Android phone looks perfectly fine. That is the frustrating moment when Android phone microphone repair moves from a minor annoyance to an urgent need. Whether you are taking work calls, checking in with family, attending class, or sending voice notes, a microphone problem can make a reliable phone feel unusable.
The good news is that muffled, quiet, distorted, or completely missing audio does not automatically mean you need a new phone. Sometimes the fix is simple. Other times, the microphone itself, charging port assembly, internal connector, or water-damaged component needs professional attention. The key is knowing what to check first and when to stop troubleshooting before the problem gets worse.
What a Bad Android Microphone Sounds Like
Microphone trouble does not always sound the same. Your voice may come through very quietly on regular calls but work normally on speakerphone. Video recordings may have static, while voice messages sound clear. Google Assistant may stop recognizing commands, or callers may only hear you when you hold the phone at a certain angle.
Those differences matter because many Android models use more than one microphone. A primary mic typically handles standard calls, while secondary microphones can support noise reduction, speakerphone calls, video recording, and voice commands. The location and design vary by manufacturer and model, so a problem with one microphone does not always affect every feature.
Before assuming the internal hardware has failed, test a few apps. Make a standard phone call, record a short voice memo, record a video with both front and rear cameras, and try a voice command. If the problem appears everywhere, it is more likely a phone-level issue. If it happens in only one app, settings, permissions, or the app itself may be the real cause.
Common Causes of Android Phone Microphone Problems
The simplest cause is also one of the most common: blocked microphone openings. Lint, pocket debris, makeup, food particles, or residue from a phone case can cover the tiny mic port. Because the opening is so small, even a light buildup can make your voice sound distant or muffled.
A poorly fitted case or screen protector can cause the same issue. This is especially easy to miss after replacing a case. Remove it, then test a call again. If your voice suddenly sounds normal, you have found the problem without needing a repair.
Software can also get in the way. An app may not have microphone permission, Bluetooth may be routing sound to earbuds or a car system, or a recent update may have created a temporary glitch. Restarting the phone, checking app permissions, disconnecting Bluetooth accessories, and installing pending updates are sensible first steps.
When those checks do not help, the issue may be physical. Drops can loosen a connector or damage a small component inside the phone. Water exposure can corrode microphone contacts, sometimes causing trouble immediately and sometimes days later. On many devices, the primary microphone is connected to the charging port assembly, so charging issues and microphone problems may appear together.
Safe Checks You Can Try at Home
Start with a restart. It sounds basic, but it clears temporary software errors and reconnects services that may have stopped responding properly. Then turn Bluetooth off completely and make a test call. Your phone may still be connected to a headset you forgot was paired.
Next, inspect the microphone opening near the bottom edge of the phone. Use a dry, soft brush to gently remove loose debris. Do not push a pin, needle, paper clip, or toothpick into the opening. It is easy to puncture the protective mesh or damage the microphone underneath, turning a small cleaning issue into a larger repair.
Check microphone permissions in your Android settings as well. If a specific app cannot hear you, make sure it is allowed to use the microphone. You can also clear that app’s cache or reinstall it if the issue started after an update.
If the phone was dropped, splashed, or exposed to humidity, avoid charging it until a technician has inspected it. Heat, charging current, and trapped moisture can make corrosion spread. Rice is not a reliable repair method and can leave dust inside ports. A proper water-damage assessment involves opening the device, inspecting the board and connectors, cleaning affected areas, and testing the phone afterward.
When Android Phone Microphone Repair Is the Right Move
A professional repair makes sense when the microphone fails in multiple apps, your phone has been dropped or exposed to liquid, cleaning has not helped, or the sound cuts in and out depending on how you hold the device. It is also worth getting a diagnostic if callers hear loud static, crackling, or a robotic sound. Those symptoms can point to more than a clogged port.
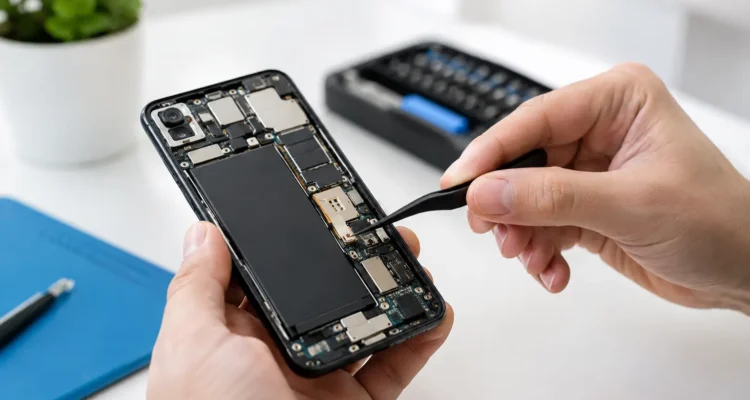
The repair itself depends on the model and the cause. A technician may replace a damaged microphone module, repair or replace the charging port flex cable, reseat a loose connector, remove debris safely, or address corrosion from water exposure. On certain phones, microphone work requires careful disassembly around the screen, battery, and charging components. That is not the job for improvised tools and a how-to video when your data and daily communication are on the line.
A clear diagnostic should come before a repair decision. You should know whether the issue is isolated to the mic, connected to a charging-port problem, or related to deeper motherboard damage. This helps you avoid paying for a part replacement that does not solve the actual problem.
At ProPhonez, technicians can test the microphone functions on the spot and explain what is affecting your calls before moving forward. When replacement is needed, the right part option depends on your phone model, budget, and repair goals. Genuine and high-quality aftermarket parts each have a place, and a good repair shop will explain the trade-off instead of treating every device the same.
What to Expect From a Microphone Repair Visit
Bring the phone in with a clear description of what is happening. Mention whether the issue affects calls, speakerphone, video recording, voice notes, or all of them. If it started after a drop, water exposure, software update, or case change, say so. Those details can shorten the diagnostic process.
Most microphone issues can be tested quickly, but turnaround time depends on the device model, the location of the damaged part, and whether liquid damage is involved. A simple cleaning or charging-port assembly repair may be completed much faster than board-level work. If a part needs to be ordered or corrosion has reached multiple components, the timeline can change.
Before handing over your phone, back it up if it still works well enough to do so. Microphone repairs generally do not require deleting your data, but a backup is always smart whenever a device needs internal service. If the phone has serious water damage or other signs of instability, ask about data recovery options before the damage progresses.
Keep the Problem From Coming Back
Once your calls are clear again, use a case that does not crowd the microphone ports and clean the outside of the phone regularly with a dry soft brush. Keep it away from steam, wet countertops, and loose debris in bags or pockets. If you use the phone around dust, food, or work materials, check the bottom ports more often.
Most of all, do not keep struggling through every call with a phone that cannot reliably transmit your voice. A quick diagnosis can tell you whether you need a simple cleanup, a replacement part, or a more involved repair. Clear conversations are not a luxury when your phone handles so much of your day – they are one less interruption you should have to put up with.